# UV Unwrapping
Unwrapping is the process by which you convert a 3D mesh into a 2D projection. In Blender, this is done with the U hotkey while in Edit Mode. Most default meshes come with a premade UV map, but you will likely have to re-unwrap any meshes you create or modify yourself. However, you can probably see the fundamental problem with unwrapping a closed 3D object. Where do you open it?

Switch to the UV Editing window layout, or create a subwindow for the UV/Image Editor.
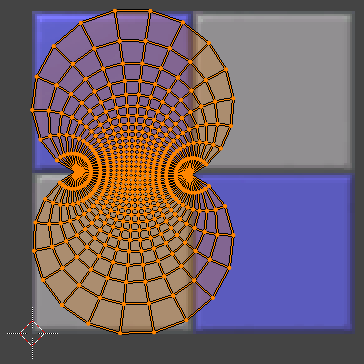
Select a series of edges and press Ctrl+E to pull up the Edge menu. Select Mark Seam to declare these edges as a place to split open the mesh. Press U and select Unwrap.
As you can tell, this doesn’t exactly look great. You can scale the UV Map in the UV/Image Editor, but it will always have this goofy look and the seams will be ugly. I recommend looking up UV unwrapping strategies for whatever general mesh shape you have. But, some general guidelines for creating UV seams:
- Try to disguise them with the geometry (e.g. use hard edges or places where there is a material change anyway) or literally hide them inside another mesh (e.g. put the example seam on the back of an eyeball inside a head)
- You almost always want mesh geometry to be proportional to UV map geometry, not stretched or scrunched insanely (again, the concept of Texels applies)
- Many projections use the viewer camera as an input, so switch to a good view first
Luckily, there are a few ways to do better with the UV map.

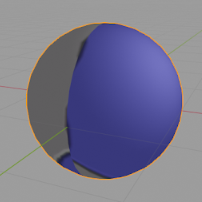
First, notice that there is a Sphere Projection option in the UV Mapping menu. This will automatically create a rather good UV map. It can be improved by scaling it both larger and wider. However, the north and south poles look wacky. If you don’t care about those, then you’re done. Otherwise, the best solution is whatever makes the most sense to you. You could re-unwrap just those faces, obscure those faces with geometry (e.g. the default Rocket League ball with its blinking lights), or accept them as a minor detail that will be weird.

You can fine-tune the UV map by hand, but you need to be careful because it’s easy to mess it up terribly.

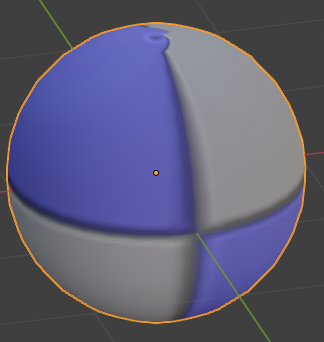
In the UV/Image Editor, change the Sticky Selection Mode to Disabled. This means that every face is effectively separate, and you can now move vertices as if nothing was connected to anything else. This is great for cleaning up very specific kinds of UV screw-ups, as shown in the picture. The reason this cleanup needs to happen is that all of these faces were extremely stretched, so they should be restored to be nearer to their actual shape.
However, 99% of the time you will want to keep the Sticky Selection Mode on Shared Location so you don’t get yourself in hot water. It can get weird quickly.