Blender Setup
There are a few user defaults which are good to change if you are just installing Blender. These are three things you should absolutely adjust, but feel free to tinker with as many others as you want. Go to Edit > Preferences:
 QOL is a big deal
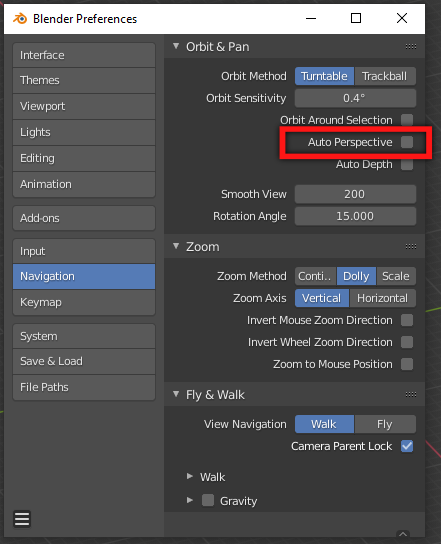
Under Navigation, turn off Auto Perspective. With this enabled, the view will switch to perspective mode every time you manually rotate the camera. This should never be the default mode :contemplativeDisappointedFace:
 Thank me later
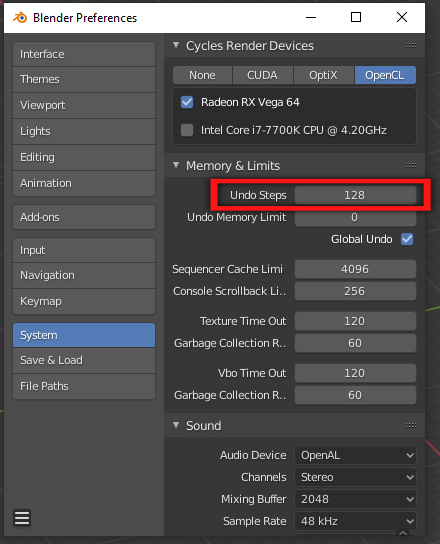
Under System, increase Undo Steps to a much bigger number than 32. This will save your life one day.
 Gotta have FBX
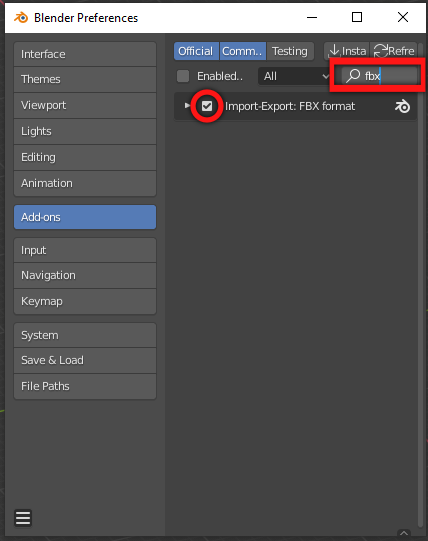
Under Add-ons, enable the FBX Importer/Exporter. We need this to create assets for UDK and Rocket League.
Lastly, click the 3 line menu button in the lower left and Save Preferences for next time. Time to get into the goods.
The Window
 Beautiful Blender and the Billion Buttons
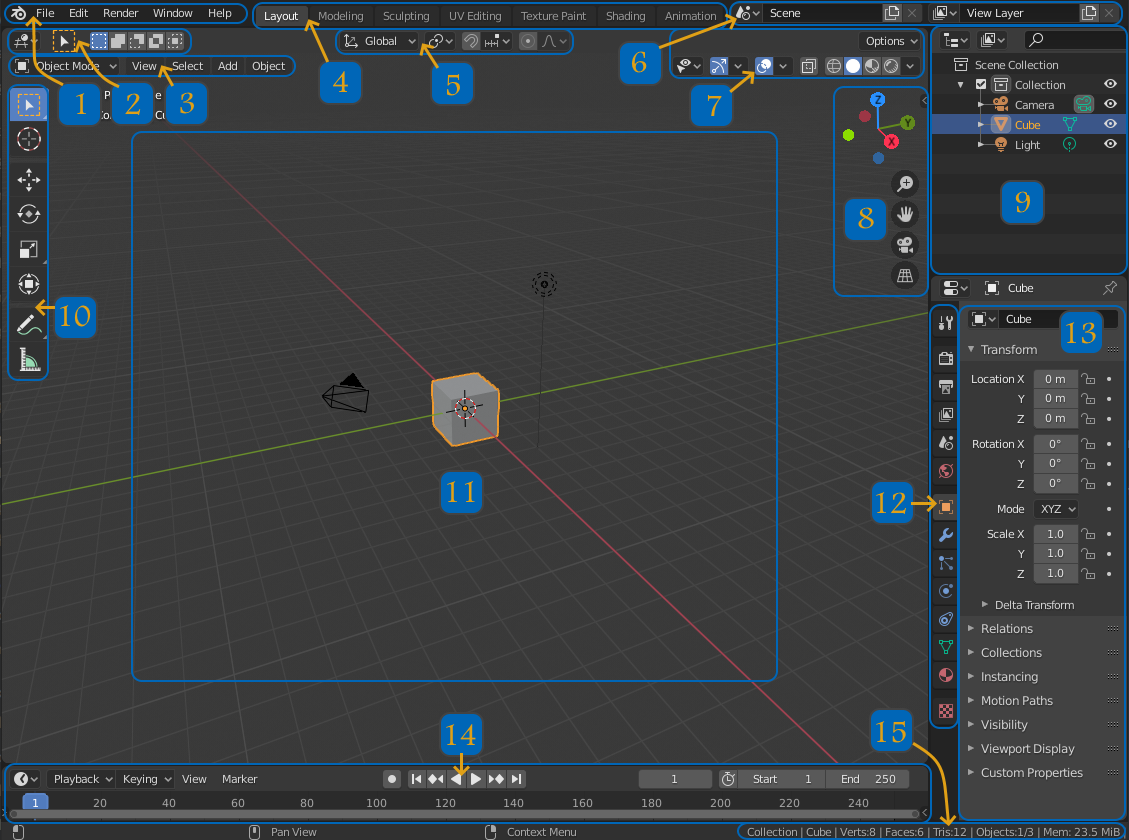
1 - Menus
These are what you would expect. One item we’ll be frequently visiting is File > Export
2 - Selection Settings
Generally you don’t need to touch these, but they can be useful. Try them out.
3 - Editor Context Menus
These menus will change based on the 3D Viewport’s current mode. They offer dozens of useful tools for 3D creation, and will be explored more in depth.
4 - Window Layouts
This bar offers a set of subwindow configurations which are tailored to different tasks. These are very useful for quickly hopping between presets, but any one of these can be configured to look any way you need.
5 - Transform Settings
These allow for snapping and proportional editing, which are very nice for certain tasks.
6 - Scene and Layer
Scenes and Layers are to help handle large or chaotic projects. Collections are perfectly fine for managing 99% of projects.
7 - Viewport Settings
These are different view modes for the 3D editor. The most common thing you will use this for is to switch between wireframe and solid views.
8 - Viewport Tools
A toolbar hidden in this area (reveal with N) contains a number of settings and related tools for the 3D Viewport.
9 - Collections Window
Collections are a way to group and label assets within the 3D workspace. You should use these like you would use visibility layers in an image editing program.
10 - Editing Tools
This is kind of a hodge-podge of tools relevant to the current editor mode, but all are useful in certain circumstances.
11 - 3D Viewport Window
This is where the magic happens.
12 - Properties Window Tabs
The Properties window is for manipulating any and all aspects of an object. The top grouping of tabs pertains to the whole project/world, while the lower grouping is specific to the type of object selected. Several of these tabs will be explained in much more detail in the Modeling section.
13 - Properties Window
Depending on the tab selected, this is where you adjust things like render output size, material emissivity, and mirroring axes.
14 - Timeline Window
This is a slider to play back animations. Spacebar will stop and start it. For our purposes, we won’t really use this.
15 - Project Information
Along the bottom bar, you can see general information about the project. This can be useful to know the complexity of your 3D objects, like to keep a mesh under UDK's limit of 65535 polygons.